Time to code! ...almost
Ok, now we know what a database is, what it does, and what we can do with it. Let's get our hands dirty! We're going to install a server stack (MAMP) on our machines that will allow us to use SQL to get information from a database running on MAMP.
This next part is my least favourite (getting stuff running on everybody's machines - some of y'all have weird set-ups, I'm not gonna lie), but the part after that, the writing code part, that's the best.
MAMP
MAMP stands for MacOS+Apache+MySQL+PHP. Don't worry if you're on Windows, it works on Windows, too. MAMP is a program that creates a virtual Apache server on your computer, along with a MySQL database and PHP. This allows us to develop websites and services using this technology stack on our own computers without having to push our code to another server.
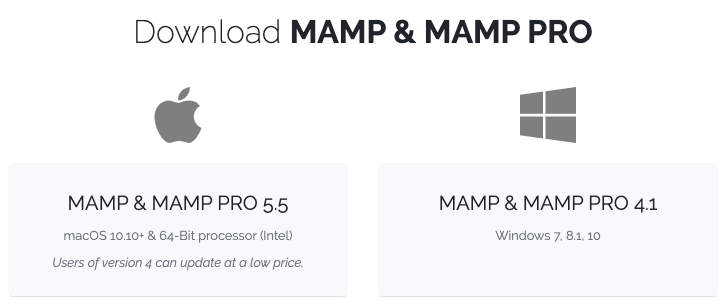
Instructions for installing MAMP
    </div>
</div>
Now that you have MAMP installed and configured, let's start it up! Open the application, and click the "Start Servers" power button.
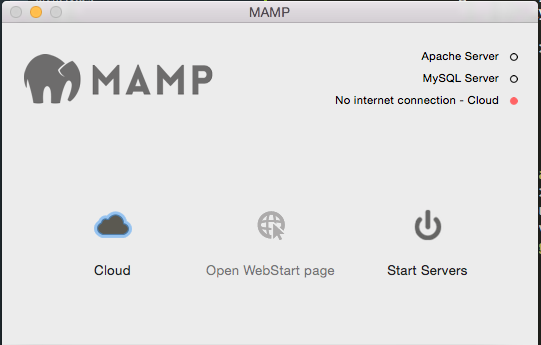
Now we've started our two servers - our database server running MySQL, and our Apache web server, which can process PHP and co-ordinate with the browser to serve web pages.
Step 1: Go to the "web server" tab in MAMP. This tells you where your htdocs folder is located.
Step 2: Create a file called index.php in the htdocs folder.
Step 3: Open your index.php file and paste in all of the following code:
Now go to your local server and refresh your browser.
If you navigate to phpMyAdmin, you'll see that we have a built-in tool for managing the database.

Let's generate some data!
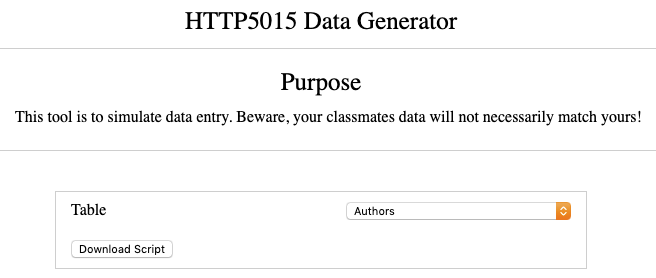
Our friend Christine has created a data generator for us. Download an .sql file from the data generator.
Now we've got some data and a database server - but we still need a database!
In phpMyAdmin, click on the "SQL" tab, paste in the code below, and click the "Go" button.
CREATE DATABASE blog;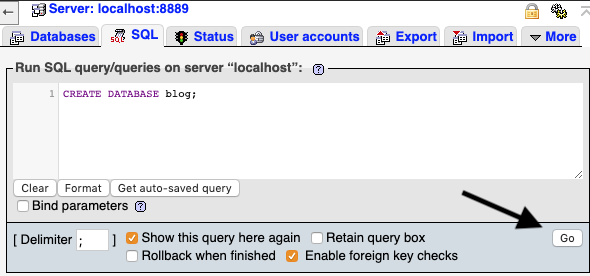
Congratulations! You've just run your first SQL command!
Let's take a moment to appreciate how easy this is to read:
CREATE DATABASE blog;The English translation of which is "Hi compter! Please create a database called "blog".
Now that we have a database, we can import the data that we generated earlier.
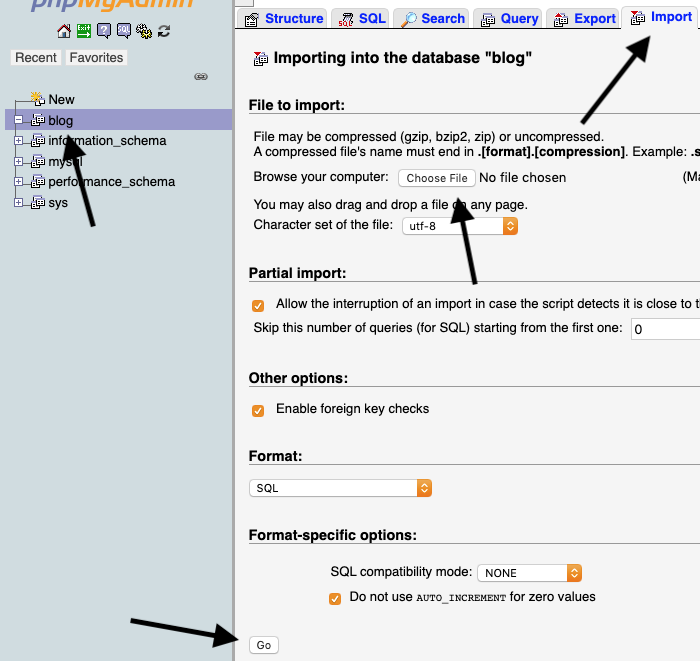
- Click on the "blog" database in the left sidebar.
- Select the "Import" tab.
- Use the "Choose File" dialog to select your
authors.sqlfile. - Click the "Go" button.
Now that we have actual data, SQL starts to get interesting. Go back to the "SQL" tab and run the following query:
SELECT * FROM authors;This translates to "Select all columns of data in all the rows from the authors table".
DBeaver
It's good to be familiar with phpMyAdmin, as it's very common, and you'll want to know what you're doing when your buddy screws up their Wordpress site and you need to rescue their data.
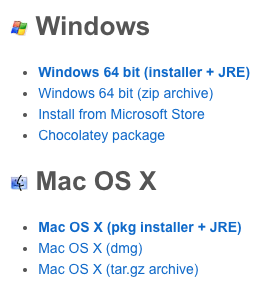
It's nice to have a tool that's a little more... robust? So let's install a program named DBeaver. It's wonderful for managing MySQL, but it supports a huge range of other Database Management Systems, too!
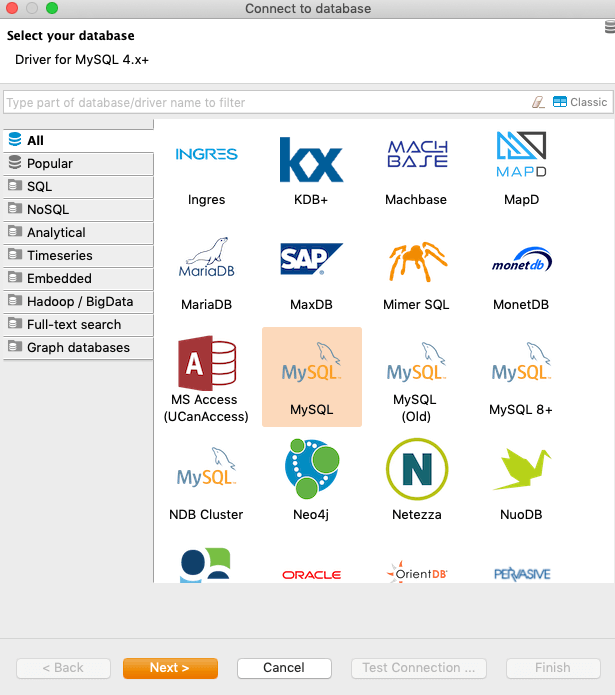
Once you've downloaded, installed and started DBeaver, it will ask you to select a driver for your first database connection - select the "All" tab and choose "MySQL" (not MySQL 8+ - MAMP runs on MySQL 5.7 as of this writing).
You may be prompted to download an additional driver - and you should!
Finally, you can fill out the prompt to connect to our database. Fill out the following values:
| Port | User name | Password |
|---|---|---|
| 8889 | root | root |
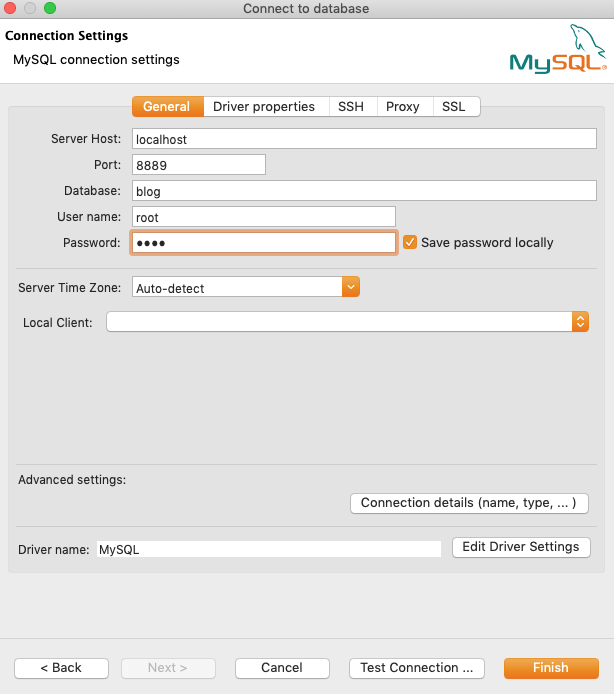
Finally, test your connection with - you guessed it - the "Test Connection ..." button, and, provided your connection works, click "Finish".
blog database on the left.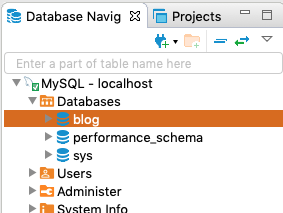

Let's try a query, just like we did in phpMyAdmin, but we'll add a little spice to it:
SELECT * FROM blog.authors
WHERE authoremail LIKE '%yahoo.c%'Today we're working with the data that aligns with the textbook, which is pretty dry small business data. Not that exciting.
I'm going to try to incorporate data that's a little more compelling in the coming weeks to demonstrate just how powerful it can be to ask good questions, and get good answers.
There is a wealth of publicly available, super-interesting data out there! Here's a few examples and resources for you to look at:
Examples:
- Bike theft in Toronto, 2014-2017 Opens in a new tab
- Swearing in Tarantino Movies (NSFW) Opens in a new tab
- Hate crimes and income inequality Opens in a new tab
- Effects of climate change on Ontario forests Opens in a new tab
- Texas execution data Opens in a new tab
Resources:
- A list of 2600+ Open Data portals around the world Opens in a new tab
- Data sets from fivethirtyeight.com Opens in a new tab
- Google custom search Opens in a new tab
- Reddit/r/datasets Opens in a new tab
.csv, .xls, etc. into a database.For today, though, we're going to import some big fat databases based on the textbook.
- Download this zip file and unzip it.
- In DBeaver, go to
File>Importand selectScripts. - Click
next, and for "Input directory", select the folder that you unzipped (create_db). - Under "Root scripts folder", select "Scripts", and click
Finish. - Finally, from the DBeaver menu, select "SQL Editor", and, under the "Choose SQL Script" dialog, you should see
create_mysql_databases.sql.
Select this .sql file, and then run it with the "Execute Script" button.
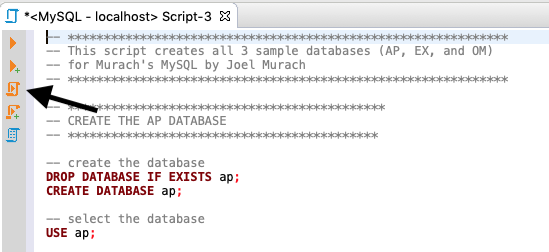
One more thing, just to give MySQL a slightly more 'generic' dialect of our SQL language, please run the following:
SET GLOBAL sql_mode='ANSI';Vanilla MySQL has a few little quirks that we'll cover later on. The line of code above serves to "normalize" those quirks.
That's going to give us a real relational database to play with! But first, a little historical context :)